Emery Dress No. 2 + 5 Sewing Tips for Beginners!

Aloha friends! Spring is in the air and it's officially time to bust this dress (and these pictures) out of the archives. This lovely is my second Emery dress and i must say... I love it just as much as my first Emery. The shilouette is classic and can be dressed up or down depending on the fabric used and the alterations (i.e. shorter skirt, no sleeves, flowy fabric). If you would like an in depth review of this sewing pattern then check out THIS POST

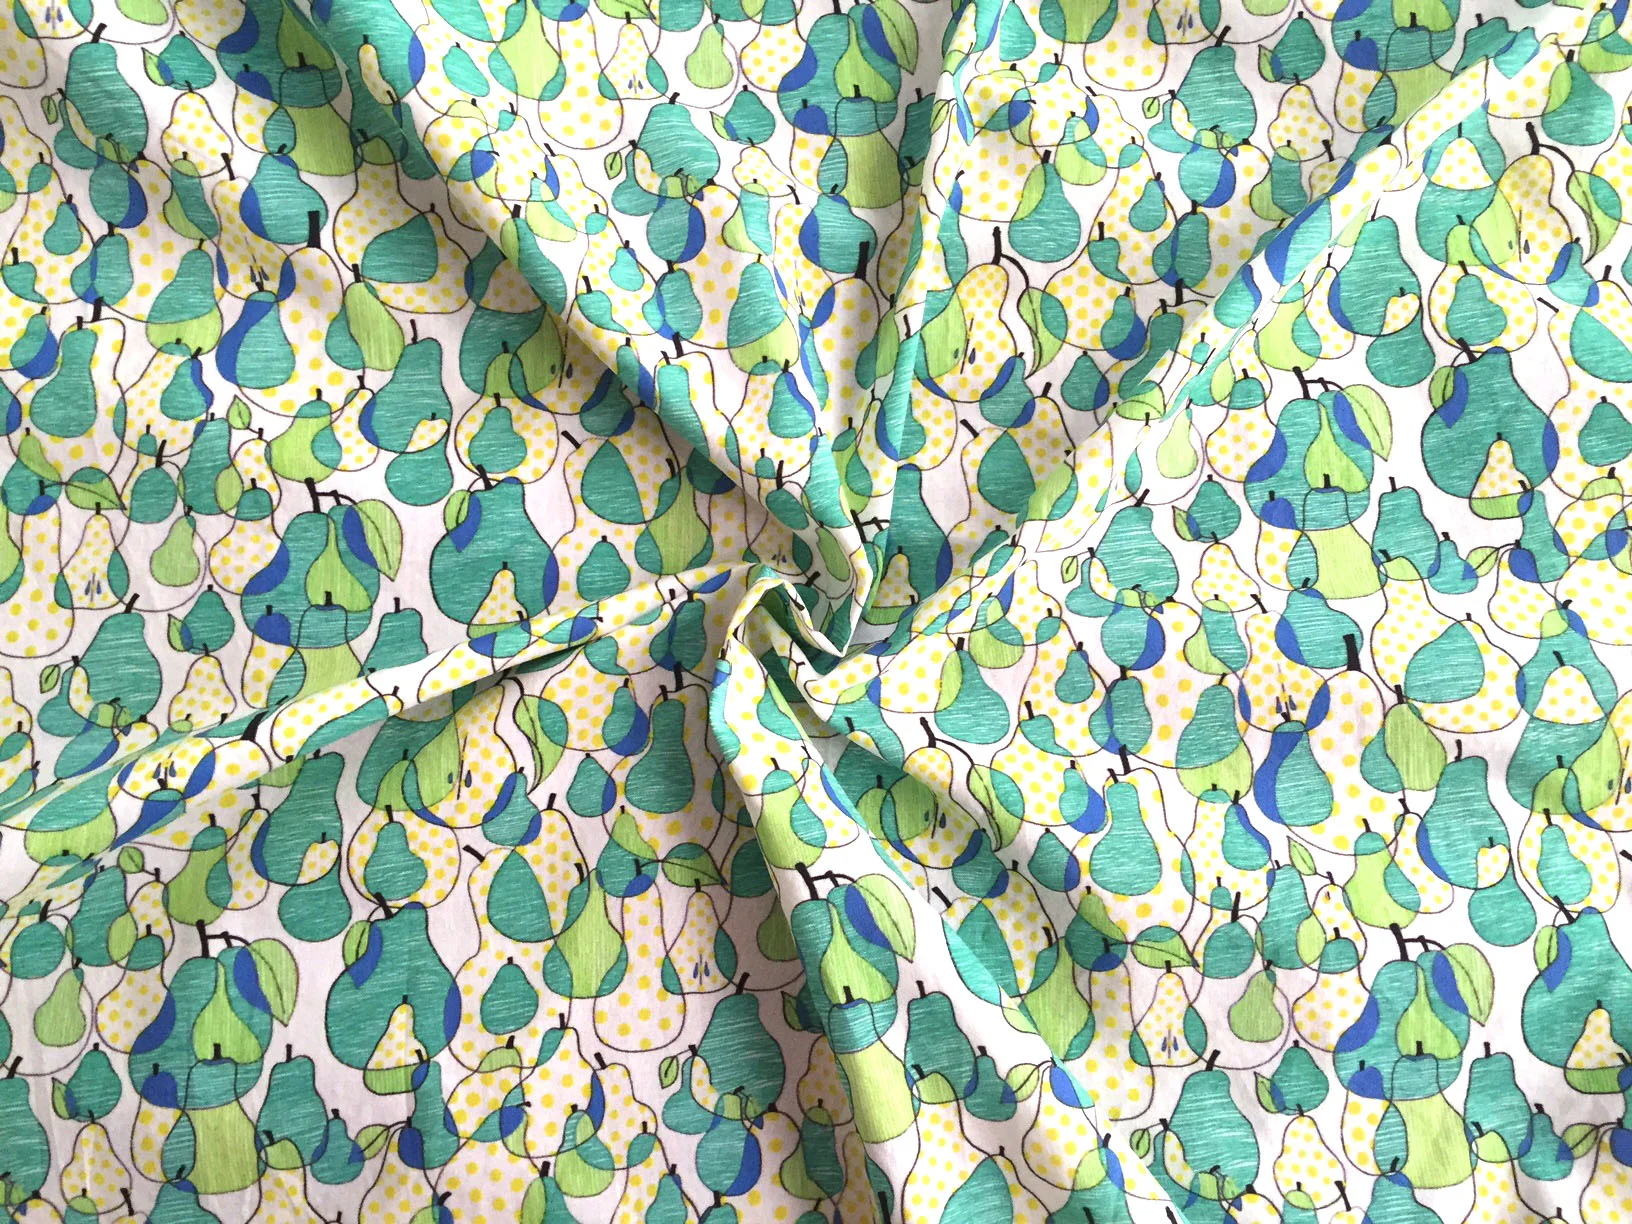
Garment: Emery Dress by Christine Haynes // Fabric: Pear by Call Me Chartreuse

Garment: Emery Dress by Christine Haynes // Fabric: Pear by Call Me Chartreuse

There are so many benefits to sewing your own clothes (can we talk about the customization!!!!), but it can be hard to know where to start since there is a ton of information out there!

Because I love you all, here are 5 Sewing Tips for Beginners that have helped me the most in my sewing journey. 

1. Oil your machine! I know, I know...sounds way too simple right? Trust me, wether you have a $50 machine or a $1,000 machine a clean machine makes all the difference. It'll run a whole lot quieter and smoother if it's free of lint and freshly oiled.

2. Get yourself a walking foot. A walking foot provides you with an extra set of grips on top of your work to help the fabric feed easier, which prevents the top fabric from shifting while you sew. It's especially great for matching stripes, slippery fabric, and stretchy fabric. This presser foot is by far my favorite sewing accessory and very rarely leaves my machine.  

Bernina Walking Foot... insert heart eye emoji.

Bernina Walking Foot... insert heart eye emoji.

3. Use a pencil for tracing pattern pieces onto fabric. This tip I learned from Jen of Grainline Studios. Pencil is great because it shows up on a wide variety of fabrics, doesn't smudge like a chalk tracer, and doesn't disappear after ten minutes. Cut just inside the pencil lines when you are done tracing and you are good to go.

4. Start with a pattern that has a sew-a-long. When an indie designer releases a new pattern often times they will also host a sew-a-long on their blog with in depth pictures and instructions regarding that particular pattern. This is a great option if you find yourself staring at the original written instructions going "wait....WHAT?!" every 5 seconds. 

5. Unsure about the fit of a pattern? Make a muslin!!!!! If you are unsure about how a garment is going to fit buy some cheap fabric and make a practice piece. For my first Emery I was pretty sure i'd have to shorten the bodice and was positive i'd have to do a small Bust Adjustment (SBA), so instead of cutting directly into my final fabric I cut out the bodice pieces in some cheap fabric and basted it together to see where i'd have to make those adjustments. which means you will be much happier with the fit of the final piece. If it's my first time sewing a pattern that has techniques I haven't done before or if I want to test the fit (but still be able to wear the piece if it comes out good) I make a wearable muslin from a low cost pretty fabric. 

**Bonus** Head to Sprout Patterns for easy peasy customizable cut-and-sew projects. Sprout combines Indie sewing patterns with designs from the Spoonflower community. Just pick a sewing pattern (from pouches to baby clothes to adult garments) and chose the design. All you have to do is cut it out and sew it up! To pair a garment with one of my own designs search by designer when choosing a design and type in Call Me Chartreuse. I purchased a Lark tee in my Camera pattern, so i'll be sure to report back. 

Pear fabric//Call Me Chartreuse

Pear fabric//Call Me Chartreuse

What sewing tips would you give to a beginner?? Let me know in the comments!

#LindenSwap

lindenswap01
lindenswap02

Hi guys! Happy Tuesday. This past week has been a huge whirlwind of events/emotions. My father-in-law passed away a week and a half ago, so I took that time off to spend time with family and help get things in order for the memorial service. Dealing with the death of a loved one plus being away from the studio for so long is not the best recipe, but spending time with relatives that I haven't seen in awhile (some I met first time) was worth the time away. It also gave me a chance to get back into really working in my sketchbook. Not to figure out ideas (although i do use it for that), but to use the page to rest.

Now what you came for... the Linden Swap! To recap, Carrie of Oh She Dabbles and Ingrid of We The Sewing started a swap for all those who adore the awesomeness that is Grainline Studios' Linden Sweatshirt. This was my first time participating in a swap, so I was a tad bit nervous. It's weird to not to try on a garment throughout the process of sewing it, but it turned out to be such a great experience that i'd totally do it again!

lindenswap03

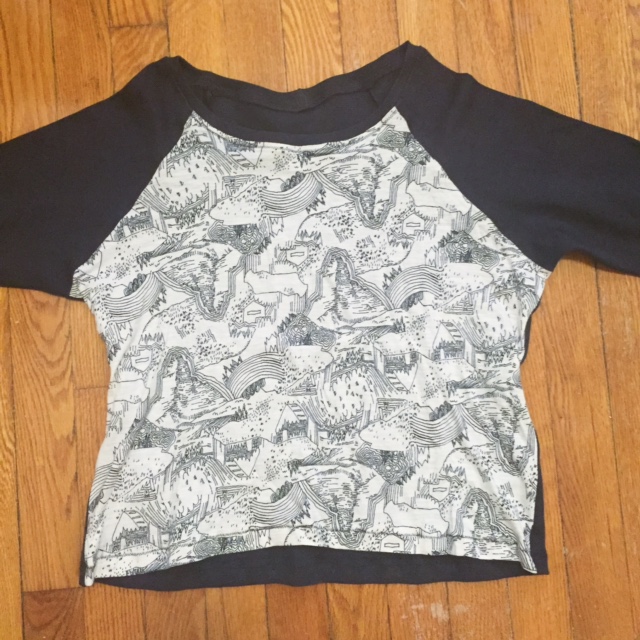
I swapped a Linden with Jess from Wardrobe Ecology and this is the one she sent me! Isn't it lovely?! She made View B for me since my first Linden had long sleeves. The patterned fabric is an organic cotton jersey from Feral Childe called "Somthin' Else" and combined that with a mid-weight black knit fabric. I did a happy dance when I opened the package because it's so......ME! Our tastes seem very similar when it comes to wardrobe, so i'm not surprised that she read me so well. 

lindenswap04
lindenswap05

If you would like to see the Linden I made for her go check out her Instagram :) Carrie recently posted the first round up of swapped Lindens. You can see those HERE.

p.s. I'm back in the studio and trying to get more organized. I'm in desperate need of some sort of planner or weekly calendar that has a good amount of writing room. If you have any suggestions for a functional and beautiful planner let me know in the comments. 

Archer x 3

archerall

Raise your hand if you remember Ms. Frizzle from The Magic School Bus… don't fret, I'm definitely going somewhere with this :) If you remember Ms. Frizzle, then you remember how each dress she wore was a perfect match for whatever crazy awesome field trip the class was about to go on. My husband and I have been watching it again on Netflix and seeing her in those colorful, loud, and quirky outfits made me want to create and customize a wardrobe that would fit me perfectly. 

After stumbling upon Grainline Studio (an independent pattern shop), I knew that Jen's Archer and Scout Woven Tee would be the first new additions to my closet. 

                                   Archer #1: wearable muslin

                                   Archer #1: wearable muslin

I made my first Archer a wearable muslin and sewed up a size 0 as is, in order to get a feel for how to construct the shirt and to see how it fit. Archer #1 was very straightforward. I used a cotton fabric from Joann's and followed Jen's sew-a-long on her blog. As the shirt was coming together I grew less and less fond of my fabric choice (the color…not the actual fabric). I can't even remember what made me pick up that color… wait… I think it was because if the shirt turned out horribly then I wouldn't be too upset. Therefore the lack of attachment was purposeful, but i digress. It came out great and the only alteration that would need to be made for my future Archers is to shorten the sleeves a bit. I actually find myself reaching for this version a lot which is a nice surprise.

                                                                      &nbs…

                                                                                Archer #2

Archer #2 is a sleeveless archer (following her Archer Variation #1 directions) with french seams and is my version of color blocking. First off let me say that I absolutely love the finished product, but my fabric choice proved to be a huge pain. There was a lot of yelling coming form the sewing room that day. I used a brown linen fabric from Joann's and a stunning Dahlia cotton fabric from Fabricworm. The linen was not the smartest choice. It's too light and stretchy to be paired with the more structured cotton, so i had to do a lot of seam ripping and re-adjusting. Not to mention I cut the right front button band wrong not once, not twice, but three times! Both fabrics were leftovers from previous projects, so it's a miracle I had enough to get it done.

I used the Dahlia fabric to add some awesome accents, as well as a way to stabilize the linen. 

                                                 Armhole binding close up.

                                                 Armhole binding close up.

                                                                      &nbs…

                                                                                       Archer #3 

Now we come to Archer #3 made in the dreamiest Robert Kaufman Chambray. The sleeves are shortened in this version and I also took the sides in a half inch. Everything was gong smoothly until it came time for me to french seam the side seams. This fabric, as amazing as it is, is the same on the right side of the fabric and the wrong side. Don't get me wrong, I LOVE that about this chambray, but I ended up doing the first step of the french seam on the wrong side of the shirt and didn't realize until I had graded my seam allowance. That led to a double french seam (which i'm sure I just made up haha) and a lot more yelling. 

On a brighter note, because the fabric is double sided I was able to do the alternate archer pocket. Yay! 

All in all the pattern is amazing and I'm already cutting out my fourth Archer :) don't be surprised if I end up with twenty of these.  

My husband was kind enough to take these pictures for me. If you want to see more head over to my flickr.